Building a custom mechanical keyboard can be a rewarding project that allows you to personalize your typing experience. Here’s a step-by-step guide to get you started:
1. Understand the Basics
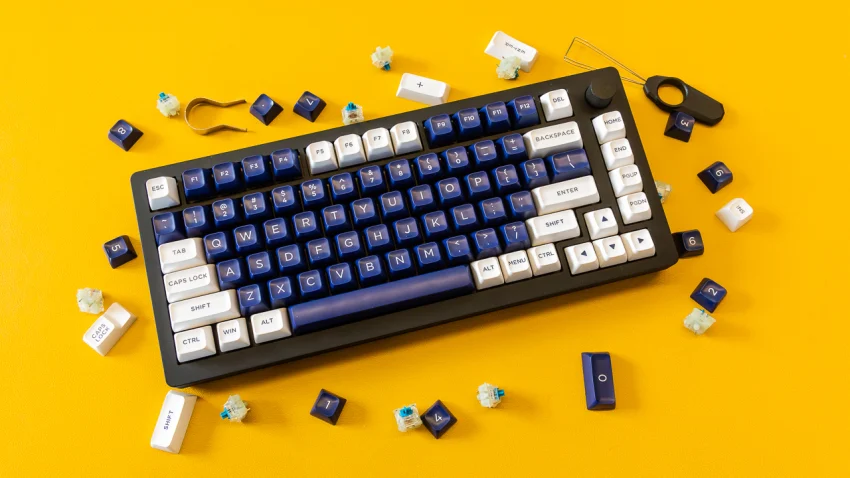
- Key Components:
- Case: Houses all the components.
- PCB (Printed Circuit Board): The circuit board where switches are mounted.
- Plate: Adds structural rigidity and holds switches in place.
- Switches: Mechanical components that register key presses.
- Keycaps: The visible part of the keyboard you type on.
- Stabilizers: Provide balance for larger keys (e.g., spacebar, enter).
- Cable: Connects the keyboard to your computer.
2. Plan Your Build
- Determine Layout and Size:
- Full-size, TKL (tenkeyless), 75%, 65%, 60%, or custom.
- Choose Your Features:
- Backlighting (RGB or single color).
- Hot-swap sockets for switch flexibility.
- Wireless or wired.
3. Gather Components
- Purchase parts from reputable vendors like Drop, Keychron, KBDFans, or NovelKeys.
- Consider buying a kit for beginners, which typically includes the case, PCB, plate, and sometimes stabilizers.
4. Choose and Prep Switches
- Types of Switches:
- Linear (smooth): e.g., Cherry MX Red, Gateron Yellow.
- Tactile (small bump): e.g., Cherry MX Brown, Boba U4T.
- Clicky (audible): e.g., Cherry MX Blue, Kailh Box White.
- Lubrication (Optional): Reduces friction and noise.
- Use appropriate lubes (e.g., Krytox 205g0) and apply sparingly.
- Test your switches on a switch tester before committing.
5. Prep Stabilizers
- Clip and lube stabilizers to eliminate rattling and improve sound.
- Attach stabilizers to the PCB or plate.
6. Assemble the Keyboard
- Install Switches:
- Snap switches into the plate and PCB (if soldering isn’t required).
- Ensure pins are straight and properly aligned.
- Soldering (If Needed):
- Use a soldering iron to secure switches to the PCB.
- Work in a ventilated area and practice good safety measures.
- Install Keycaps:
- Press the keycaps onto the switches, ensuring they fit securely.
7. Test and Troubleshoot
- Use software like VIA or QMK Configurator to test the keyboard.
- Confirm all keys register correctly.
- Adjust firmware settings if necessary.
8. Fine-Tune Your Build
- Add foam or tape mods for sound dampening.
- Customize the firmware for macros or lighting effects.
- Adjust typing angle with case feet.
9. Maintain and Upgrade
- Clean regularly to avoid dust buildup.
- Experiment with new switches or keycaps to refresh the feel and aesthetics.
Tips for Beginners
- Start with a hot-swap PCB to avoid soldering.
- Join communities like r/MechanicalKeyboards on Reddit for advice and inspiration.
- Watch tutorials on YouTube for visual guidance.
Enjoy crafting your unique keyboard tailored to your preferences!
When it comes to what’s inside today’s computer keyboards, two keyboard types predominate: dome-switch keyboards, and mechanical keyboards. Dome-switch keyboards (sometimes called “rubber dome” models) are the cheaper option, with some models retailing for $20 or less. They’re the throw-in kind you get with a desktop-PC purchase. But it’s hard to go back to one of those commodified peripherals after experiencing a fine-tuned mechanical keyboard—especially, one that you’ve assembled yourself. (Yes, that’s now a thing.)
Why Should I Go With a Mechanical Keyboard, and Build My Own?
The difference all comes down to what’s under the keys themselves. Dome-switch keyboards consist of keycaps (the plastic key tops with the actual symbols on them), a layout of domes molded into a springy, flexible rubber-like sheet (or in some cases, discrete domes under each key), and a printed circuit board (PCB) beneath them. When you press a keycap, the dome beneath it puts pressure on an element that closes a contact on the PCB and sends a signal to the computer. The dome also provides the counter-force that pops the keycap back up. But you experience no tactile response that lets you know when your key press has been registered; rubber-dome boards tend to feel mushy. And the material the domes are made from wears down over time.